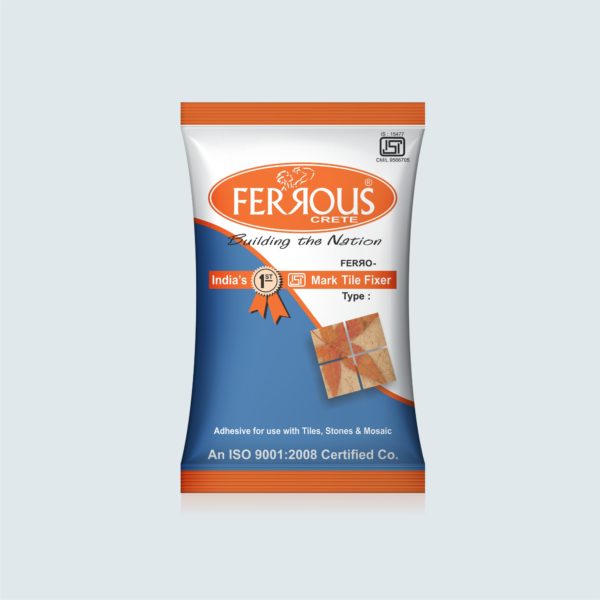
Ferrous Crete is a leading manufacturer of Polymer modified adhesives in India. The company is primarily located in Faridabad, Haryana.

FERRO – 1155 (PREMIUM MORTAR ADHESIVE)

Ferro – 1155 is a high performance two part system. Specially design for use with F AD – 22 Polymer Liquid. It produce high strength thick bed adhesive up to 50 mm for installation of all types of tiles and natural stone. This system has exception bond strength, flexural strength elongation and freeze/ thaw durability. Ideal for use in green building

CATEGORY: Adhesives

  • Description

    APPICATIONS

    Most interior and exterior residential on floors, walls and ceilings. Installation of ceramic tiles porcelain tiles, glass tiles, quarry tiles, pavers, saltillo tiles and most types of marbles, granites, natural stones etc.

  • Technical Data

    • Density
    • : 1.7 kg/litre
    • Pot Life
    • : 1.5-2 hrs
    • Open Time
    • : 30 minutes
    • Adjustability
    • : 35 minutes
    • Setting Time
    • : Approx. 1 Day
    • Full Strength
    • : Approx. 14 Day
    • Shear Strength
    • : Approx. 14.4 KN
  • COVERAGE AREA

    Thickness Ferro – 1155 FAD – 22 Admix Water Coverage
    12 mm 20kg. 1.25 ltr. 3.75 ltr. 25 Sqft.
    25mm 20kg. 1.25 ltr. 3.75 ltr. 12 Sqft.
    35mm 20kg. 1 ltr. 4 ltr. 8 ltr.
    50mm 20kg. .85 ltr. 4.15 ltr. 5 ltr.
  • Additional Information

    • Colour : Grey & White
    • Pack Size : 20 Kg.
    • Type : 2
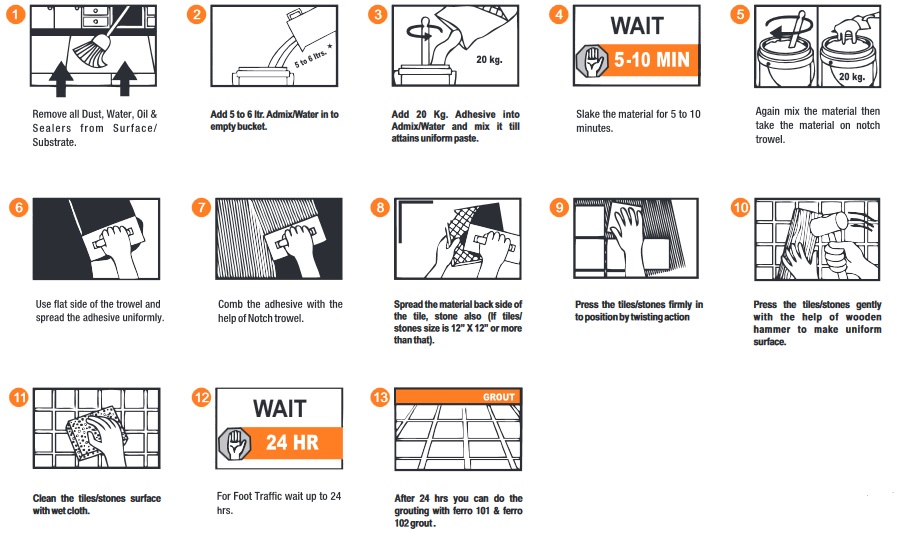
  • PRODUCT MIXING AND APPLICATION

    edx
    • Use approx 20 Kg. of Ferro – 1155 with 1 ltr. of F AD – 22 + 4 ltrs. of water, mix by hand/slow speed mixer to semi dry consistency.
    • Choose a typical notched trowel with sufficient depth to achieve maximum mortar contact to both the tile and substrate for all interior and exterior installations.
    • Commercial floor and wet application if tile size is more than 12” x 12” back buttering is required.
    • Apply additional mortar; combine it in a single direction with the trowels notched side.
    • Spread only as much mortar as can be tiled before product skins over. Open time can vary with job site conditions.
    • Place the tiles firmly into the wet mortar. Push the tile back and forth in a direction perpendicular to trowel lines to collapse the mortar ridges and to help achieve max coverage.
    • Remove excess mortar from the joints area so that at least 2/3 at the tile depth is available for grouting.
  • How to Use Video